Lychee Gantt Chart Functions and Operation Method
❏ Setting Permissions
In order to edit a Gantt chart, you must have the "View gantt chart" and "Manage gantt chart" permissions. These can be selected under "Administration > Roles and Permissions".

Note:
Be aware that if you do not have permission to view a Gantt chart, it will not be displayed in the project menu even if the Lychee Schedule Management (Gantt Chart) module is set to ON.
❏ Changing Dates (Period)
Moving your cursor to the edge of a Gantt bar displayed in a Gantt chart will cause the cursor to change to . Clicking and dragging will then allow you to change the length of the Gantt bar, thereby changing the time period.


❏ Changing Dates (Start Date)
Moving your cursor anywhere over a Gantt bar other than the edges will cause the cursor to change to . Clicking and dragging will then allow you to move the Gantt bar, thereby changing the start date.


❏ Setting Dates
Issues which do not have specified dates can be dragged in the Gantt area to set their start and due dates.


❏ Solid Lines Displayed in Gantt Charts
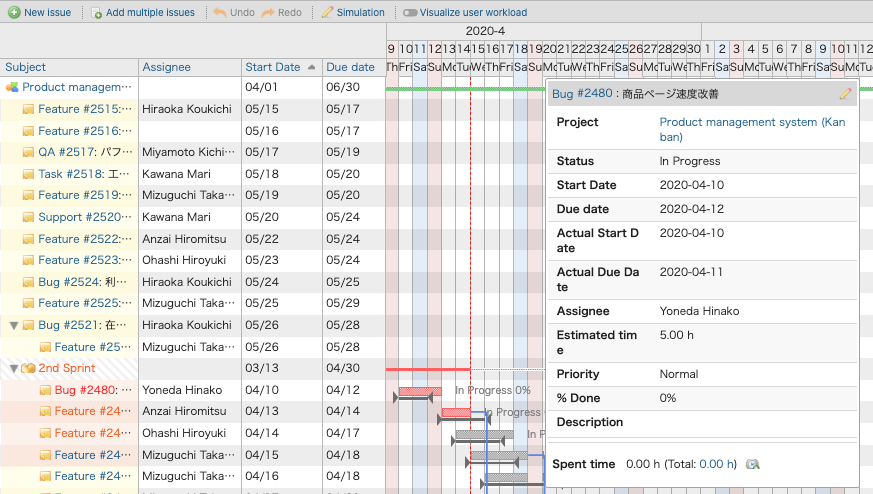
The actual start and due dates recorded for an issue will be displayed in the Gantt chart as a solid line. If the actual due date is not entered, the issue will be displayed as a solid line from the actual start date until the current date.

❏ Creating a New Issue
Clicking the New Issue link in the top left of a Gantt chart allows you to register a new issue from the issue editing form.

❏ Editing an Issue
1.Editing from the issue editing form
Clicking on either an issue's number or Gantt bar on the Gantt chart will display the issue editing form.
Clicking the pencil icon in the top right will allow you to edit and update information.

To display custom fields in the issue editing form, go to the Custom Fields settings screen and check the box for "Display in Issue Edit Form of Lychee Gantt Chart".

2.Editing from Context Menus
Right-clicking on an issue in the left pane will display a context menu. From here, you can update standard editing items such as status, tracker, and priority. You can also perform operations such as deleting the issue.

❏ Changing Sequence of Issues
Moving your cursor over a Gantt bar will cause a button to be displayed. Clicking this button will move the cursor to a linked issue and cause a black line to be displayed.
Clicking on the Gantt bar for the linked issue will allow you to change the sequential order of issues.


❏ Changing Parent-Child Relationships between Issues
Click the issue you want to be the child issue, turning the row blue. Now drag and drop the child issue onto the intended parent issue. This will create a parent-child relationship between the issues.
*To create several child issues at the same time, control+click each row (command+click for Macs) to select multiple rows.
Additionally, clicking on the intended child issue and then right-clicking on the row of the intended parent issue will call up a context menu. Selecting "Parental Relation > Adopt issues as children" will also allow you to create a parent-child relationship between issues.


❏ Collapsing/Expanding Parent-child Issues
Clicking an issue's ▼ icon in the left pane will collapse the display of parent-child relationships.
Clicking on the ▶ icon will expand the view and display that issue's parent-child relationships.
❏ Setting Display Colors for Issue Statuses
Setting Status Display Color
You can assign different colors for different issue statuses.
Supplementary Information
Display colors can be set by users with administrative permissions in Redmine.
From the Redmine administration menu, clicking "Issue statuses" will take you to the editing screen, where you can select the color for each status.

❏ Changing Version Status
Right-clicking the version in the left pane will display a context menu which allows you to change the status information.

❏ Downloading PDFs
Clicking the PDF link and selecting the size and orientation will allow you to download the Gantt chart as a PDF.

❏ Setting Headers
In the Project Settings > Lychee Gantt Chart tab, you can set the information you want to output in PDF headers beforehand.
